Did you ever get a message on your phone’s screen such as “Not Registered on Network Error,” “No SIM Card,” “Emergency Calls Only,” or “No SIM Card Detected”? It’s really annoying when you receive such messages after you’ve properly placed a SIM card into your phone.
Your Android smartphone may not recognise the SIM card for a number of reasons. The SIM card may not have been inserted properly, or your device may be suffering a software problem. If your phone ever gives you the “No SIM card detected” error, for whatever reason, you need to find a fast fix.
Fortunately, we have several easy solutions that should assist you. You should know that if your SIM card becomes damaged, you’ll need to contact your service provider to get a replacement. Now, let’s find some solutions!
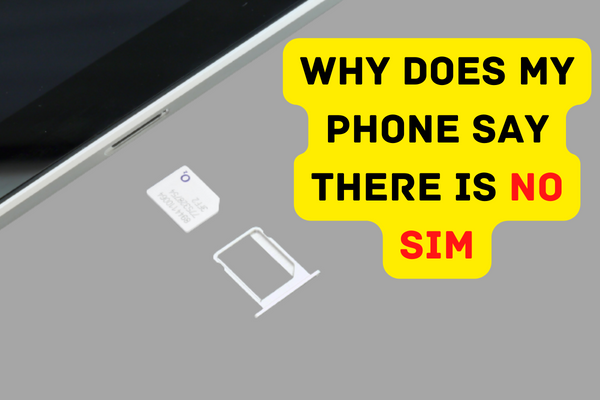
Solutions to Fix Why My Phone Says: There is No SIM
1: Force Restart Your Device
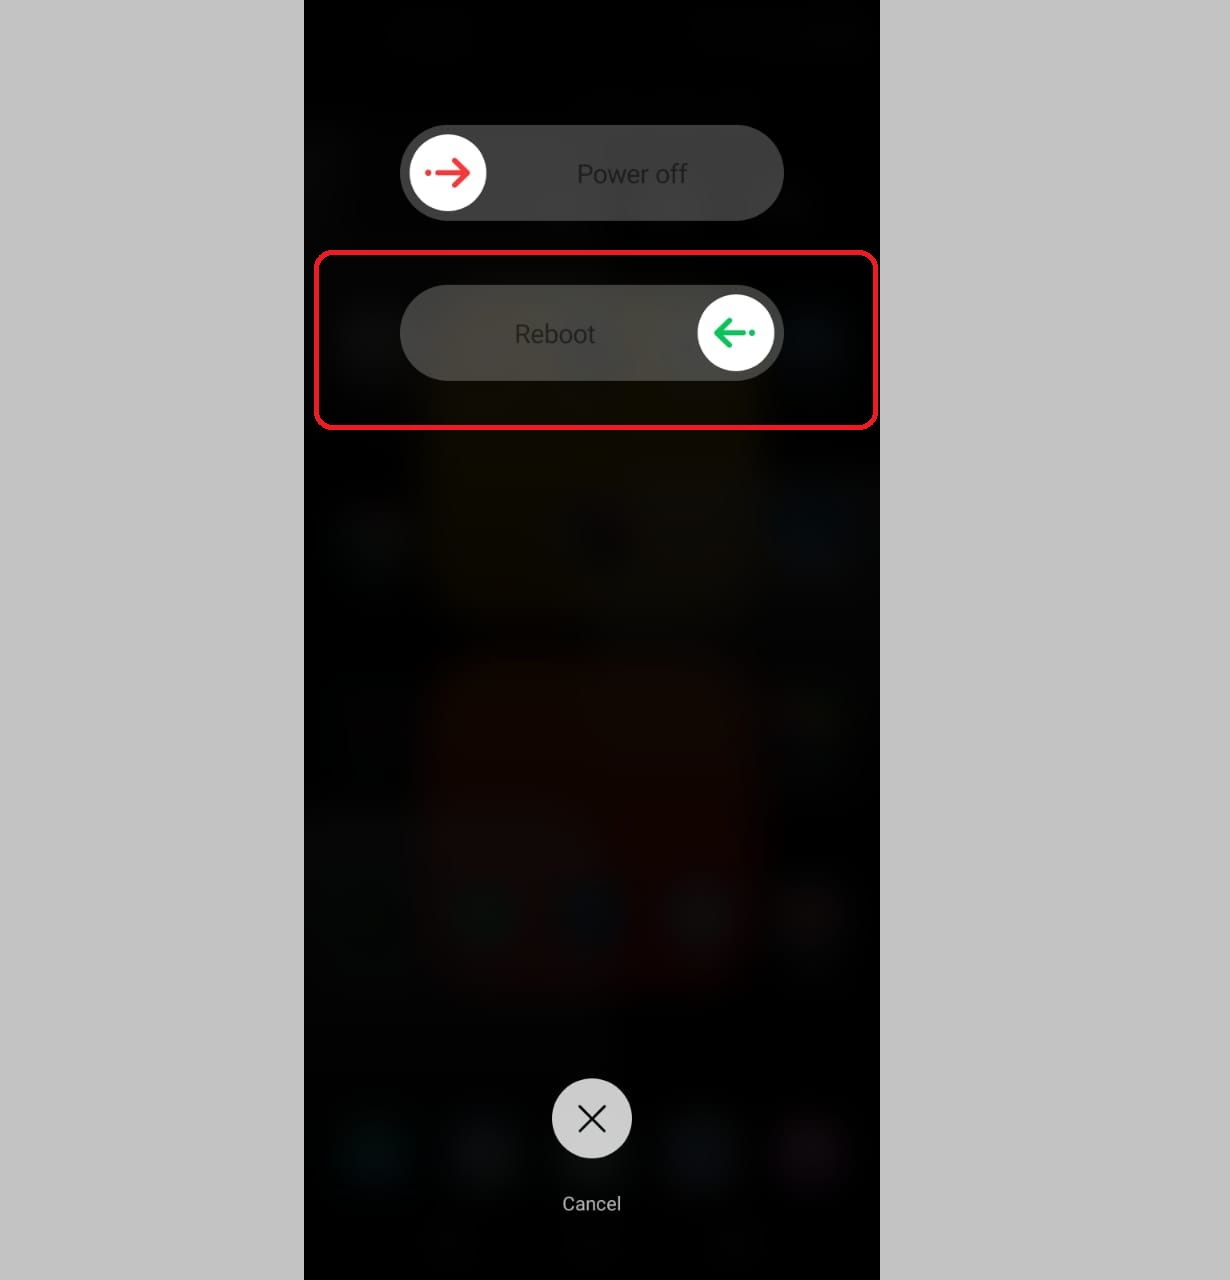
So, let’s start with the simplest and most basic answer. In this and other similar circumstances, a forced restart is a common and useful workaround. It won’t take more than a few seconds of your time, and it’s really easy.
Try simultaneously pressing the power and volume down buttons. Do not let go of the buttons until you see the Phone icon.
2: Toggle Airplane Mode
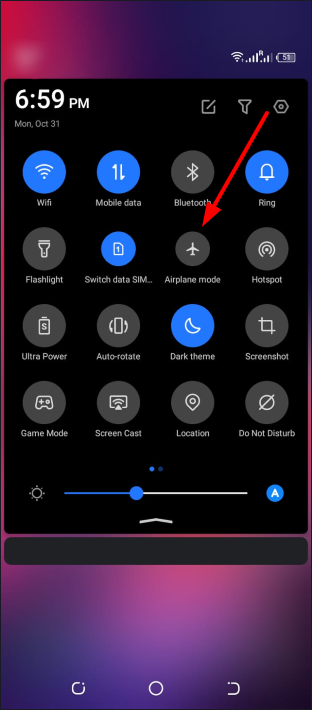
Once you find that there is no error with your SIM card, then you may try toggling the airplane mode and see if it helps in fixing the problem. Here is how to do it:
- Swipe from Up to Down to Get Notifications Pane
- Find the Airplane Mode Option
- Turn on Airplane Mode, Wait for a Second and Turn it Off
3: Manually Choose Carrier Operator
Because of software updates, your preferences might suddenly shift in unexpected ways at times. As a result of this alteration, the connection may become unstable at moments. Go to the manufacturer’s website for assistance if these directions vary from what’s shown on the user interface.
- Go to Settings
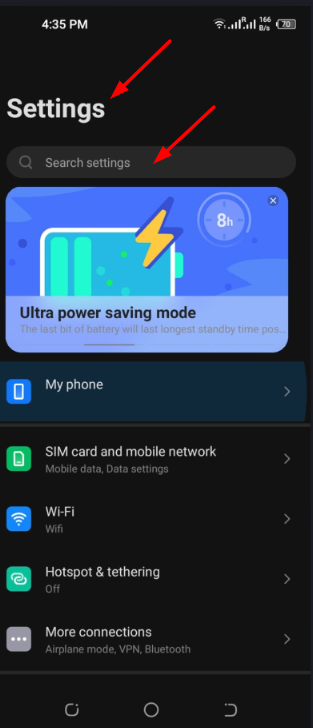
- Find “Simcard and Mobile Network“
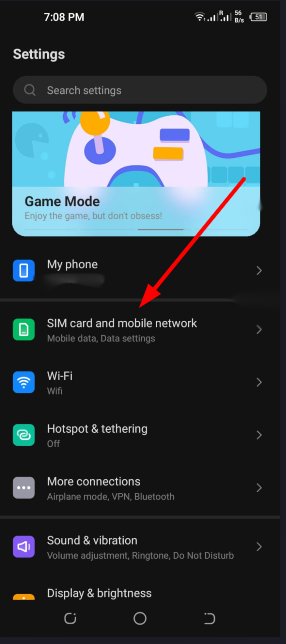
- Now Find “Mobile Network” and Tap on it
- Now Choose “Network Operators“
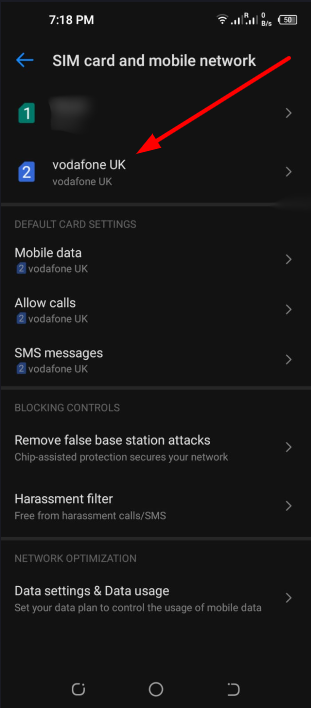
- Search for Your Network Manually
If you can’t find these options in your smartphone, we also have other steps to follow such as:
- Go to Settings
- Look for “Wireless and Networks“
- Now Tap on “Data Storage“
- Look for 3 Vertical Dots (Top Right Corner)
- Tap on 3 Vertical Dots and Now Choose “Cellular Networks“
- Tap “Network Operators” and Search Manually
4: Change Network Mode to Auto
If you set your device’s Network Mode to Automatic, it will automatically connect to the most reliable network available. Read on for further instructions on how to use this feature if you’re unfamiliar with it.
- Go to Settings
- Look for “Wireless and Networks“
- Now Tap on “Mobile Networks“
- Tap on “Network Mode“
- Choose “LTE/3G/2G (Auto Connect)
5: Remove and Re-Insert SIM Card
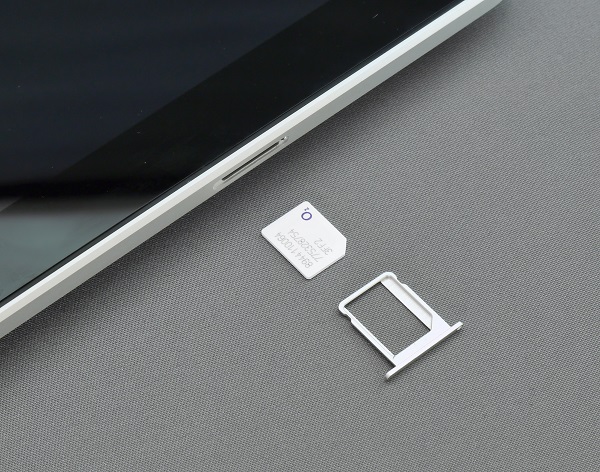
It’s important to power down your Android smartphone before inserting or removing SIM cards to avoid damaging either the phone or the card. Protect the SIM card from damage by avoiding bending or scratching it.
The SIM card slot on most new gadgets is right next to the power or volume controls. Older Android smartphones’ SIM cards may be accessed by sliding off the back cover and taking out the battery.
6: Reset Your Network Settings
It is also possible to completely reset the network settings on a smartphone if you are unsure of the nature of the software problem preventing the SIM card from being recognised. This will return your network settings to their factory defaults without deleting any data.
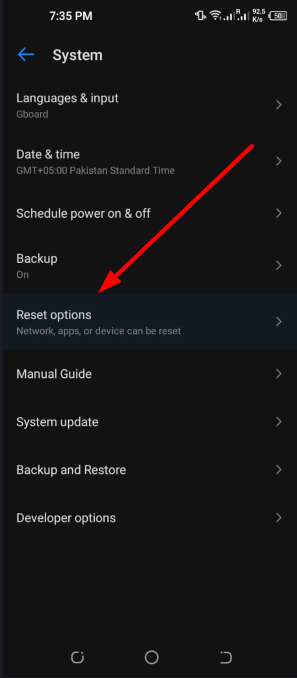
- Go to Settings and Scroll Down to Find “System“
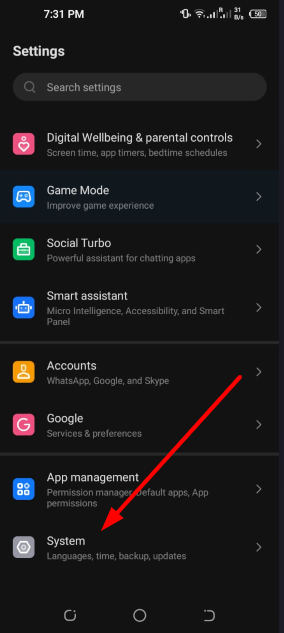
- Tap on System and Look for “Reset Options“
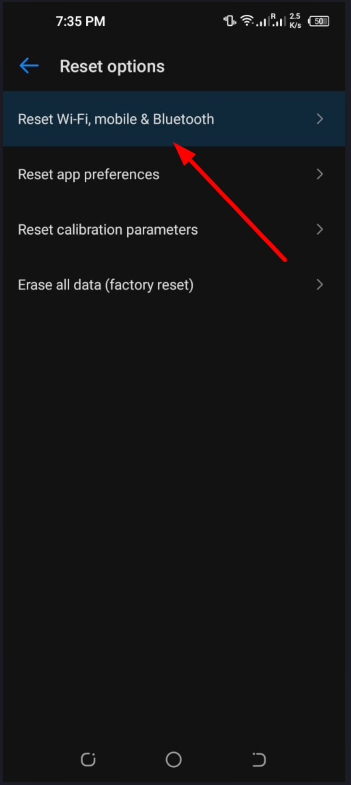
- Now Choose “Reset Wi-Fi, Mobile & Bluetooth“
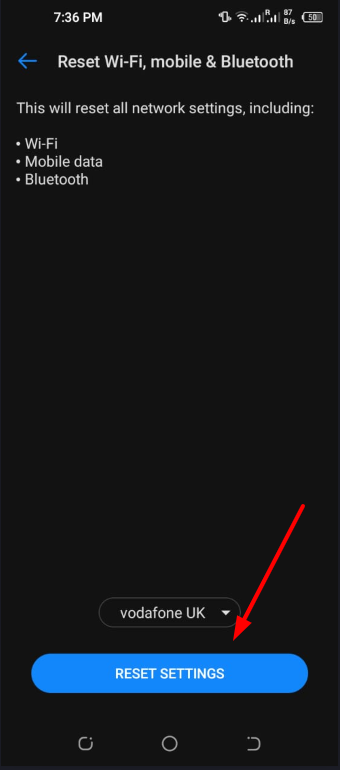
- Tap on Reset Settings
7: Reset Your Phone
If you’ve tried everything we’ve suggested and the problem persists, try restoring the device to its factory settings.
When you reset your phone, all of the data that has been collected through time will be deleted, and you will also lose any settings that have been modified by you. So, before you start the reset process, make sure you have a backup of your data.
